Sunday, August 11, 2013

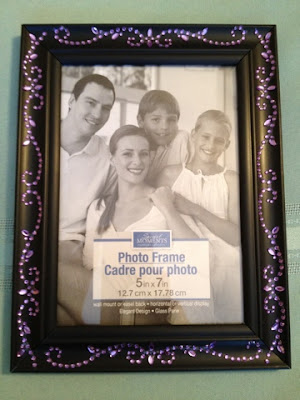
Easy Blinged-Out Photo Frame: under $5 per frame!

DIY Blinged-Out Photo Frames

Part of the reason that I've been so MIA on my blog entries this summer is that I was VERY busy for awhile in preparation for my sister's wedding! It was an amazing day!


The following project was actually her inspiration, and I assisted her in creating them. At her bridal shower and wedding, she wanted to showcase a feature called "Meet the Maids." Each frame showed a photo of one of her bridesmaids, along with a paragraph about the special relationship she shares with her. It was a really touching and cute addition to the events, and frames cost less than $5 each to make! Can't go wrong with that!

Supplies:

1. "Bling on a roll" (first photo below)- this had adhesive on the back of miniature rhinestones in a continuous roll that could be cut to size. Can be found at a craft store like A.C. Moore. Each roll was on clearance and cost under $3 - score!

2. 4x6 photo frames with sides wide enough to accomodate the "bling" that you purchase. The black "wooden" frames were purchased at Dollar Tree!


 Instructions:

1. Measure each side of your photo frame. 

2. Cut four strips of your "bling on a roll" to match the sizes of each side you are decorating.

3. Very carefully lay down and adhere your "bling" to each side of your photo frame. 

Ta-da!

The photo below shows the finished product - the frames WITH the personalized notes about each bridesmaid displayed (that portion of the project not part of this blog post). This very simple DIY project really added a special touch to otherwise boring photo frames.   


Ribbon Topiary:)


The inspiration for / instructions you will need to re-create the ribbon sphere portion of this craft is going to be found by reading up on how I make my ribbon wreaths: here.

The list of supplies and other steps in making this topiary can be found below.

Supplies:

1. Small styrofoam ball (I honestly don't remember what size I got, it was so long ago! I'm sorry!- about 2x the size of a baseball).

2. Various ribbon in whatever theme/colors you'd like. Grosgrain ribbon is best and I recommend you avoid sheer ribbon. 

3. Mini pail / decorative container for the base of your topiary. Mine is a $1 metal bucket from the dollar bin at Target.

4. Fake grass, paper or plastic - this was easy to find around Easter.

5. Wooden dowel, 5/8'' or 1/2'' thick and about one foot in length (can be cut to your needs).

6. Acrylic paint and a medium size brush

7. Styrofoam block (enough to stick in the container you have chosen).

8. Super glue

9. Dressmaker pins

Instructions

1. Take the wooden dowel and poke a hole in the bottom center of your styrofoam ball. Take the dowel out of the hole. 

2. Follow the technique for creating the ribbon loops (4'' long) and pinning them on the ball by referencing my previous post: here. Do not cover the hole that you made.

3. Use desired acrylic paint to paint your wooden dowel and let it dry.

4. When ball is covered, put a couple drops of super glue in the hole and push the wooden dowel into the hole.

5. Cut your styrofoam block to fit snugly inside your pail / canister / base for your topiary. 

6. Put some super glue in the bottom of the container and push the block on top of the glue. Let dry for one minute.

7. Take the dowel (with ball already attached on other end) and push a hole into the center of your styrofoam base. You may remove the dowel and put some glue inside there before putting the dowel back in permanently.

8. Use fake grass to hide styrofoam / fill your canister and give it the look of grass at the base of your topiary. 


Wednesday, May 8, 2013

crafty & creative bridal shower!

Well, I've definitely been on blogging hiatus. Things are extremely hectic in my personal life right now: plus there are only about 4 people who read this blog, so I figured it would be OK to back-burner it for awhile. Did you miss me? ;)

One of the major reasons I've been so busy:  my sister is getting married in 2 weeks!!! It's been 18 months in the making, but I'm sure it's going to be an amazing event! Lots of hard work has gone into planning every detail--including some crafty projects that I can start to feature on here soon. A couple of things we made are still secret to be seen on the wedding day. :)

Her bridal shower was April 20, and as the Matron of Honor, I was largely responsible for making sure it didn't suck (UGH, I'm old!!- matron). The theme of the shower was "a Girly Christmas" - which might make no sense to people: Christmas in April? Well - my sister is Christmas CRAZY- it's her favorite time of year, hands down. She turns into an 8 year old again. Seriously. Also, her finace proposed to her on Christmas Eve 2011, and the proposal was Christmas themed as well. We did a spin on things by creating decor that was "girly" rather than traditional green and red. Mostly pinks, silver and her favorite color: purple!!

Just for fun, I am featuring some photos of the decor/displays/centerpieces for everyone. Just on the off chance that you EVER decide to do a "Girly Christmas" themed party, here are some ideas for you. There isn't an awful lot of actual crafting involved in this post - just a couple of items were created by us for the event. But, I was pretty proud of the outcome - and my sister loved it (the theme was a complete surprise to her ahead of time!). Enjoy and feel free to comment on how absolutely awesome and creative the bridal party is: it was truly a one-of-a-kind shower. :) 

"GIRLY CHRISTMAS" BRIDAL SHOWER IDEAS:

A photo from every Christmas she's had.

Centerpieces: mini tinsel trees, holiday candy, silver votive candles in purple holders. Favors: Holiday candy and Yankee votive candles (Christmas scents).

Cake, created by Cakes by Karen.

Purple, silver, pink galore. Purple Christmas lights- very fun!

Closer up picture of the centerpieces.

Handmade Christmas ornament wreath (by me). Decor for the entry and later a grand prize for a game.

Guestbook: write your well-wishes on a Christmas ornament for the bride to keep and display on her tree for years to come!

"Meet the Maids" by the bride - table decorated with pre-lit purple tinsel trees, mini candy canes and holiday candy.


Christmas ornament "guestbook" entries are hung for display.


We totally surprised her by having her fiance come in dressed as Santa! It was so funny and cute. :)

One of our games - a Christmas cookie decorating contest!

We provided all the supplies and freshly baked sugar cookies cut out into Christmas shapes: the guests got creative!

The four finalists, picked by the bride!

Grand prize winner - she really liked the wreath. :) :) :)


Sunday, March 31, 2013

Easy Mod Podge Print to Canvas

I've been finding some really cute and/or inspirational quotes on the Internet. Often, these "printables" are found in PDF format with accompanying artwork and cool fonts. I have found many on Pinterest (no surprise there!)- I've also found a lot of projects on Pinterest involving Mod Podge. Marry these two ideas and you have my next project!

First, I downloaded my free printable. Since my color printer isn't the best, I decided I would pay to get it printed. I sent the file to Staples via their Internet site. It was something like 60 cents a page, which I thought was very reasonable!

I bought the supplies I needed at the craft store - an 8x10 canvas; a bottle of Mod Podge (matte finish); a small foam brush and a bottle of blue acrylic paint. When all was said and done, I spent less than $15 (and the Mod Podge can be used for many other projects!)

Essentially, I wanted to adhere my print to canvas for display or hanging - this, of course, an alternative to framing it. I like how if you do it right, your print ends up looking like it was printed directly on the canvas. This is reminiscent of wall art you can buy at a store like Target or Bed, Bath and Beyond.

Directions:

1. Paint your canvas. I did the sides and border, since my print was going to cover the entire front.

2. While that dried, I trimmed the sides of my print. It was 8x11 and my canvas was 8x10. Using a ruler and Exacto knife helped make the cuts straight and smooth.

3. Use the sponge brush to apply a thin coat of Mod Podge to the entire front of the canvas.

4. Gently lay your print on the front of the canvas. Smooth the bubbles of the paper with the sides and palm of your hand.

5. Apply a thin layer of Mod Podge on the top of your print to seal it and add a nice sheen to the top when it dries. I left it overnight- this ensured that it dried completely, and any small bubbles somehow disappeared! Not sure how that happens, but I had read online that it does- then I saw it for myself!

I put the finished product in my therapy office. I didn't hang it because my walls are pretty well decorated- but it added some needed color to my side table. I've had clients comment about its vibrant color, but especially about the message the quote sends.

This would also be an easy and appreciated gift to give. Try it out and see!


Tuesday, March 26, 2013

Spring Tulle Wreath - SO Colorful!

Yes I know, another wreath. But I did take a wreath break for awhile, so hopefully you're feeling ready for another. :) Once again, I found the original idea for this on Pinterest - I really liked how this one came out, and thought the DIY was very easy to follow. See the post that inspired my spring wreath by going here.

This one was fairly easy compared to the other wreaths I've made. I decided this one would showcase colors that I felt represent spring and Easter. As usual, the post is organized as follows: a photo of the final project; a list of necessary supplies; step-by-step DIY guide and then photos that I took at various stages of the project.

Supplies:


  • 6" rolls of tulle. I had six total rolls - some were 15 yards and some were 25 yards. I ended up having plenty leftover.
  • 10" styrofoam wreath. The tulle really expands the size of your wreath, so an 8 or 10 inch wreath is going to yield a good size wreath (mine ended up being about 14'').
  • Scissors
  • Ruler
  • Ribbon to hang your finished wreath

Instructions:

1. Cut your tulle at the desired length. If you like the size of my wreath, I cut each piece of tulle at about 22 inches long. I would cut 4 pieces of each color (except my glitter tulle- for that I only did two at a time). 

2. Fold your piece of tulle in half. Loop this piece of tulle around your wreath and pull the loose ends through the loop. The original DIY can explain this better than I see to be able to word it; hopefully you can tell how I did it by looking at the photos, too.

3. Repeat, repeat, repeat. 

4. Push your tulle as close together as you'd like. I liked mine to be really full, so I definitely pushed the tulle very tightly as I went around the wreath.

5. Choose a coordinating ribbon and loop around the top of the wreath - knot and tie a bow!

TIP: Do NOT buy glitter tulle unless you are prepared to have a HUGE mess. I'm not joking - the glitter got EVERYWHERE. I will not be using it if I make another tulle wreath.

Simple, right?? Do any combination of colors for the season or a specific holiday- you could also jazz it up by adding embellishments. Be creative with it and I think you'll like the end product!


Thursday, March 14, 2013

5 Minute, $5 Spring Craft!

This one is simple and cheap - can't beat that! To add a nice pop of color and floral cheer to your home, make one or several to display on tabletops.

Painted Mason Jar with Faux Flowers


Supplies:
-Mason Jar or similar (mine was purchased at the Dollar Tree)

-Acrylic paint (as shown; from craft store this was 87 cents)

- Faux flowers (I chose hydrangeas from the craft store and used a coupon. They often have choices of fake flowers at a dollar store that you could use)

-Newspaper

-Optional: foam brush and hair dryer.

Instructions:
Steps are shown in the photographs at the bottom of this blog entry.

1. Take off the jar of the lid. You won't be needing it; you can save it for something else if you want but I discarded.

2. Squeeze acrylic paint in your mason jar. Once a thin later covers the bottom, stop squeezing.

3. Slowly turn the jar upside down, sideways and around to coat the inside of the jar. The paint is thick and moves slowly, so be patient. You may need to add more, but really give it a chance to get coated with that first small amount you put in before you add more. Too much paint makes a mess later.

4. Once the jar is fully coated inside, turn it upside down on the newspaper. Wait about a minute.

5. Lift the jar from the newspaper and use the foam brush (or a wet paper towel, or your finger) to wipe the excess paint that has dripped along the rim. If you see a lot of paint pooling in the bottom of your jar, you need to repeat this step until there is barely any that drips out when you hold it upside down (this is why I said less is more for the paint :))

6. If you'd like, you can blow dry the inside of the jar for a couple of minutes. It starts the drying process, but would take a very long time to dry it this way completely. Because....

7. You will need to set it right-side up for about 24 hours until it's completely dry. When the paint has coated the inside and the rim is free of any excess paint drips (AND you don't have a pool of paint hanging out in the bottom)- THEN you are ready for this step.

8. When the jar is dry inside, place your faux flowers inside and find a spot to show off your work!

OK, so technically this project takes a day before it's done...but the actual work does only take about 5 minutes. The rest is letting paint dry (exciting). I think I'll make another with lavender paint for the main floor bathroom. Let me know if you enjoy this craft and if you do one, please share pictures with us! Happy spring! 


Wednesday, March 6, 2013

Easter candle holder

As is the case with most of the crafts I've tried, I found my inspiration for this Easter project on Pinterest. Shocking, I know! The original can be found here. It should be noted, however,that I made some changes to the DIY provided in the original post. The biggest change is that I bought and decorated my own wooden Easter eggs; the original author says that she bought hers (and that they are plastic! They are so cutely decorated; unfortunately the only plastic eggs I could find looked cheap and kid-like). 

Below, you will find a supply list, step-by-step directions, photos I took during the process, and photos of the final product. I hope you enjoy and give it a try, too!


Supplies:
  • Two unfinished wooden circles from the craft supply store (to serve as the top and bottom of the candle holder).
  • At least 3 wooden eggs, unfinished.
  • 1/4'' diameter wooden dowel, unfinished.
  • Acrylic paint in various colors.
  • Various size paint brushes, especially small ones for detail work.
  • Acrylic seal clear coat (your choice of matte or glossy finish).
  • Drill with 1/4'' drill bit.
  • Glue gun or wood glue.
Instructions:

1. Begin by choosing a solid color to paint both wooden circles. Paint one side; allow to dry completely. Turn over and paint other side; allow to dry.

2. Drill a 1/4'' hole in the center of each circle, about halfway deep.

3. If you would like, you can paint other colors/designs or put a faux finish on the circles, which will now serve as the base and top of your candle holder. I sponge painted yellow lightly on top of the robin's egg blue that I had chosen as a base color.

4.  Drill a 1/4'' hole through the center of your wooden eggs. NOTE: This was NOT an easy task. I actually delegated the drilling tasks to my husband. :) He started with a smaller drill bit and drilled a smaller sized hole all the way through the egg; then he went back and widened the hole with the 1/4'' drill bit. He did this in order to reduce the chances of the wood splitting- he also drilled slowly and carefully, which I definitely recommend you do as well.

5. Paint your eggs! This was the fun part. Apply a base coat, and allow it to dry completely. Then, get creative and decorate your eggs with as many colors and patterns as you'd like! Again, wait for the eggs to dry completely before moving on to the next step.

6. Put a small drop of glue from your glue gun or wood glue into the hole in your candle holder base.

7. Insert the wooden dowel into this hole in the base.

8. Slide your 3 wooden eggs onto the wooden dowel.

9. Leave about 1/2'' of dowel sticking out of the hole from the top egg; the rest of the dowel can be cut off and discarded.

10. Repeat step 6 with the other wooden circle (serving as the top).

11. Slide on to the top part where the 1/2'' of wooden dowel is sticking out. It should sit fairly flush with the tip of your top egg.

12. Spray with clear coat in a well-ventilated area: once it's dry, choose a candle and a place to display your masterpiece!