Below, you will find a supply list, step-by-step directions, photos I took during the process, and photos of the final product. I hope you enjoy and give it a try, too!
Supplies:
- Two unfinished wooden circles from the craft supply store (to serve as the top and bottom of the candle holder).
- At least 3 wooden eggs, unfinished.
- 1/4'' diameter wooden dowel, unfinished.
- Acrylic paint in various colors.
- Various size paint brushes, especially small ones for detail work.
- Acrylic seal clear coat (your choice of matte or glossy finish).
- Drill with 1/4'' drill bit.
- Glue gun or wood glue.
1. Begin by choosing a solid color to paint both wooden circles. Paint one side; allow to dry completely. Turn over and paint other side; allow to dry.
2. Drill a 1/4'' hole in the center of each circle, about halfway deep.
3. If you would like, you can paint other colors/designs or put a faux finish on the circles, which will now serve as the base and top of your candle holder. I sponge painted yellow lightly on top of the robin's egg blue that I had chosen as a base color.
4. Drill a 1/4'' hole through the center of your wooden eggs. NOTE: This was NOT an easy task. I actually delegated the drilling tasks to my husband. :) He started with a smaller drill bit and drilled a smaller sized hole all the way through the egg; then he went back and widened the hole with the 1/4'' drill bit. He did this in order to reduce the chances of the wood splitting- he also drilled slowly and carefully, which I definitely recommend you do as well.
5. Paint your eggs! This was the fun part. Apply a base coat, and allow it to dry completely. Then, get creative and decorate your eggs with as many colors and patterns as you'd like! Again, wait for the eggs to dry completely before moving on to the next step.
6. Put a small drop of glue from your glue gun or wood glue into the hole in your candle holder base.
7. Insert the wooden dowel into this hole in the base.
8. Slide your 3 wooden eggs onto the wooden dowel.
9. Leave about 1/2'' of dowel sticking out of the hole from the top egg; the rest of the dowel can be cut off and discarded.
10. Repeat step 6 with the other wooden circle (serving as the top).
11. Slide on to the top part where the 1/2'' of wooden dowel is sticking out. It should sit fairly flush with the tip of your top egg.
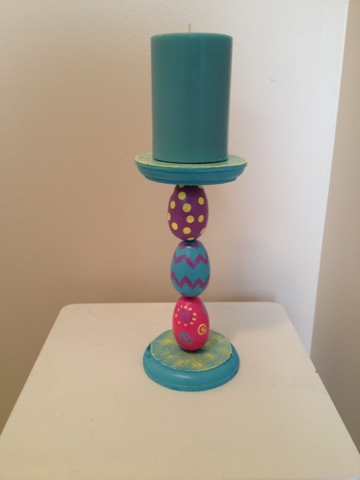
12. Spray with clear coat in a well-ventilated area: once it's dry, choose a candle and a place to display your masterpiece!


Hehe I love the Peep Calm sign behind it. However you did a wonderful job on the candle holder itself! Great job!!!
ReplyDeleteCUTE!!!! love love love!!!
ReplyDelete